How To Use Stovetop Espresso Makers
Stovetop espresso makers might seem a little confusing at first, but our guide will help you enjoy Italian coffee at home.
Our journey from automatic drip coffeemakers to stovetop espresso makers was long, but it shouldn’t have been! We received a Bialetti Moka pot as a wedding shower gift from my sister and as we had no idea how to use it, we boxed it up and dragged it around with us on our many moves. During an unpacking, we realized the handle had broken so we dumped it (big mistake but who knew!).

Cut to years later, Beppe ends up with another one from a Yankee Swap at a work Christmas party. Again, we don’t use it. Finally our drip coffeemaker breaks and as we mull over which make/model to replace it with, we dig out the Moka pot and carefully read the directions and start using it, but only as an interim solution. After a few tries, we figured out that using it is not only easy, but an espresso is so much better!
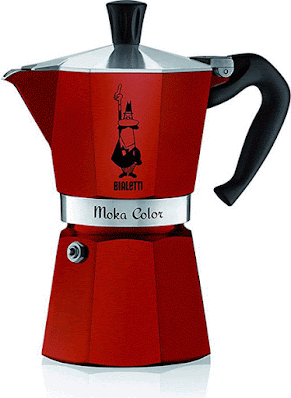
So if you’re intimidated (like we were) by the newness of the whole thing, we’re here to share some tips on getting started using your stovetop espresso maker. We’re using the Bialetti as a reference point but these directions also work for other Moka pots like the ones from Alessi and Ilsa.
Cleaning Steps
- Wash your new Moka with hot, soapy water. This is the ONLY time you will use soap on this! Rinse thoroughly. Going forward, you’ll only rinse out all parts of the Moka with plain, hot water. Never using soap again, and especially not the dishwasher. Bialetti recommends drying it with a towel but we never have. Your call!
- You’re going to brew 3 pots initially (without drinking it, just pour the liquid down the drain) to season the pot. This is the time to use up some of your coarse ground coffee that you’ve used in your drip coffeemaker, or any other coffee you want to get rid of/don’t care about.
- Fill the bottom with cold water but don’t let the level go above the valve (you can see it on the inside). Many Moka reservoirs have a fill-line on them for reference.
- Put in the funnel and fill it with ground espresso but don’t tamp it down/pack it. Wipe off any grounds that end up on the rim.
- Screw on the top part NOT using the handle as leverage (this is how you end up snapping the handle off).
- Put the Moka on the burner and turn it on. If you have a gas stove, the flame shouldn’t be so high that it comes up the sides of the pot. If you have an electric stove, try medium high your first time to see if that temperature works well and then adjust from there.
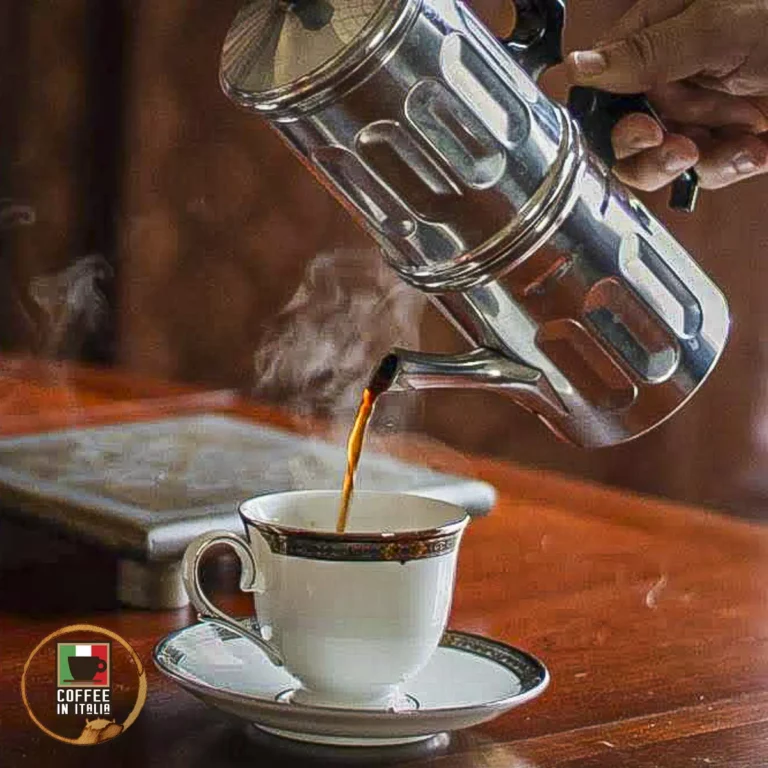
- The steam will begin to rise and the coffee will start to come out of the holes in the center post. You can check it out by lifting the lid, but be careful. You’ll hear a boiling or gurgling sound during this process. Once the sound stops, lift the lid and see if the pot looks full and coffee has stopped coming out.
- Turn off burner, remove pot. Some folks like to put a spoon directly into the top (where the coffee is) to stir it before pouring so all the layers of espresso get mixed together. We usually forgo this if we’re pouring the entire contents into one cup as it will get mixed there anyway!
Random other info:
Get espresso coffee that is ground specifically for Mokas. Sometimes a really fine espresso grind will cause too much pressure to build up in the pot, and the release valve will whistle (loudly) while it’s boiling.
The burner shouldn’t be set too high, it could lead to coffee tasting burnt. After a few tries we’re sure you’ll figure it out.
Periodically you should replace the rubber gasket that is on the bottom of the top part. You’ll notice that over time it starts to deteriorate. The replacements aren’t expensive so always keep one on hand.

More Italian Stove-Top Espresso Makers
If you found this article about a stove-top espresso maker helpful and/or inspiring, please check out some of these other reviews that I think you will also enjoy:
- The Best Italian Coffee Maker – A Complete Guide.
- What Coffee Machine Do Italians Use? Here They Are!
- What Are Italian Coffee Makers Called?
- How to Make the Best Italian Coffee Again And Again.
- A Good Coffee Grinder Can Improve Your Italian Coffee.
- A Stovetop Espresso Maker Brings Italian Coffee Home.
- Using Italian Coffee Pods Are A Delicious And Easy Option.
- Authentic Italian Cappuccino Maker – What To Look For.
- The Italian Manual Espresso Maker – Your Quick Guide.
- An Electric Italian Espresso Maker Can Be A Perfect Gift.
- The Cuccumella: How to Brew in a Neapolitan Flip Coffee Pot.
- Skip The Bialetti Mini Express 2-Cup Stovetop Coffee Maker.
- Coffee From Italy Can Be Enjoyed At Home Overview.
- The “La Cupola” By Alessi Will Brighten Every Morning.
- The Beautiful Alessi Pulcina Stove-Top Espresso Maker.
- Could A Famous Stove-Top Espresso Maker Go Out Of Business?
- Long Live The Amazing Bialetti Stove-Top Espresso Makers!
- A Neapolitan Coffee Experience.
- Moka Express Review: Is This The Best Espresso Maker Ever?
- Our Krups Coffee Machine Review: Nespresso Essenza Mini.
- Bialetti Brikka Review: Is The Coffee Crema Worth It?
- Moka Pot Mistakes That Can Wreck A Delicious Italian Coffee.
- Moka Pot Cleaning With Vinegar.
- Iconic Bialetti Company Sold To Hong Kong Investors.